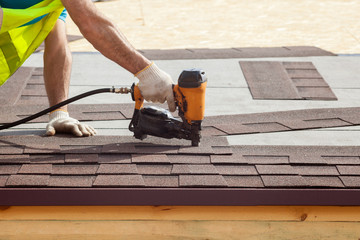
post

HVAC – Heating, Ventilation and Air-Conditioning Systems

Heating, ventilation and air-conditioning systems are a vital component of modern homes and commercial buildings. HVAC knowledge empowers building owners and contractors to make wise purchasing and maintenance decisions. Contact Naples Comfort Systems By Stahlman Cooling & Heating for professional assistance.

HVAC systems have four main functions:

1. Heating

The heating element of your HVAC system provides warmth in colder weather. It works by circulating warm air throughout the home using furnaces or boilers to heat rooms and circulate it through ductwork. The system also has the ability to dehumidify the home, preventing mold and mildew from building up.

HVAC Services

The ventilation portion of your HVAC system brings in fresh outdoor air, replacing stale indoor air. It helps control moisture, removes smoke, dust, bacteria, odors, and carbon dioxide from the indoor air, and ensures proper oxygen replenishment. This improves indoor air quality and reduces health risks like allergies, asthma, and respiratory problems.

Ventilation systems can be installed in residential homes, schools, hospitals and many other types of buildings. They can range from single room units that provide a controlled environment in offices or hospitals to large, complex systems designed to ventilate an entire house or campus.

Most people are familiar with the boxy outside unit that they see on the side of a building, but what most don’t realize is that an HVAC system is much more than that. It’s a complete system that includes furnace and air conditioning components, ductwork, and controls.

Regardless of which type of HVAC system you have in your home, all of them operate the same way. The basic function is to move or exchange indoor and outdoor air. In the winter it moves heat from the indoors to the outdoors, and in the summer it does the opposite.

This process starts with the return sucks in air, which goes through the filter and then the heating component. The furnace or boiler burns a fuel source—natural gas, oil, or propane—to generate heat for the household. The heat is then distributed through ductwork and the blower pushes it through the vents.

The air conditioner portion of the HVAC system is a bit more complicated, but it still operates on the same basic principles. The system takes in outside air and pumps it inside, cooling it in the process. The system’s refrigerant is the key to this operation, and it moves heat from one area to another.

2. Cooling

A central part of hvac is the cooling component. In conjunction with heating units, it regulates temperature and humidity. HVAC systems also circulate and replace indoor air to keep it fresh from pollutants, dust, odors, pet dander and other allergens. The system can control these particles using a variety of ventilation methods such as forced air, convection and radiant.

Cooling systems can include air conditioners (also known as ductless mini-splits), heat pumps and a reversing valve. Air conditioners cool the air by pulling it in through a ductwork vent and pushing it through a refrigerant-cooled closed loop coil before distributing it throughout the home via another duct. Similarly, the heat pump uses the same internal components to move warm air from outside through a heated ductwork system and into the interior of the building during the winter.

The system’s reversing valve allows the same system to run in two directions – heating and cooling, as well as reheating. Choosing the best system depends on the building size, climate conditions and design and layout of the ductwork. It is also important to consider energy efficiency ratings and environmental standards.

To ensure optimum performance, regular maintenance is essential. The system should be checked for wear and tear, leaks, and faulty equipment. The air filter should be replaced regularly to prevent clogging and improve the flow of air throughout the house. If the air ducts or vents become blocked with dirt, it can lead to uneven temperatures throughout the home and poor airflow.

HVAC system technology is continually evolving. The term “HVAC” has become an almost generic term used to describe a broad range of technology designed to manage temperature, humidity and air quality in the home or workplace. Learning a little about the field can help consumers choose better products, avoid costly repairs and stay safe from harmful contaminants. For example, homeowners should learn about the basics of home heating and cooling costs, key terms, products and basic maintenance schedules. Those considering investing in new equipment should familiarize themselves with energy efficient options and ENERGY STAR certifications to ensure the best return on investment.

3. Ventilation

The V in HVAC stands for ventilation, which is essential to the comfort and health of building occupants. Its benefits include the removal of moisture, smoke, odors, heat, dust, airborne bacteria, carbon dioxide and other gases from conditioned indoor air and disposing of it through a ventilation exhaust system. It also improves oxygen supply and controls humidity levels and temperature.

It may seem surprising to hear that good ventilation is just as important as heating and cooling. But it’s true. As modern home construction trends move toward tighter-sealed homes, proper ventilation becomes more critical. If you are experiencing symptoms like fatigue, dizziness and upper respiratory issues, it’s possible that you have poor indoor air quality caused by low ventilation.

In old-fashioned architecture, buildings had ready access to the outdoors through windows and doors, which allowed for natural ventilation. But today’s tightly-sealed homes can make it impossible to get enough fresh air. That’s why it’s necessary to install mechanical systems for ventilation.

You have likely noticed your HVAC system’s vents throughout the house. There are the ones that allow conditioned air to be circulated, and there are the return vents, which are where the conditioned air gets pulled back into the HVAC system. The vents that allow air to be circulated are usually equipped with filters, which remove any dirt, debris or other pollutants from the incoming air.

Ventilation is also crucial in the bathroom and kitchen, where there’s a lot of moisture and odors. It’s important to ensure that these rooms have adequate ventilation and exhaust fans to remove these substances from the air before they can cause mold and mildew.

You should also consider installing ventilation slots, which are exactly what they sound like: a slot in your home’s wall that allows you to regulate the movement of air between indoors and outdoors. This can help control moisture and odor levels, as well as manage the temperatures in each room. They’re especially useful during colder weather when you tend to close the windows and trap in pollen and other irritants. The ventilation system will be able to replace those airborne pollutants with fresh, clean outdoor air.

4. Controls

As HVAC systems evolve to meet complex, dynamic needs, their controls become more intelligent. They now adapt to our daily habits without the need for human intervention. Automation reduces energy expenditure by analyzing usage patterns to target specific functions. These targeted operations avoid unnecessary energy expenditure and help maintain optimal indoor climates.

Modern control systems have evolved into intricate networks that interact with each other and are connected to smart devices, like smartphones and tablets. This integration is allowing us to manage our home and office settings remotely. This is a huge advancement that allows for greater control and more efficiency.

Whether you have a basic thermostat that requires manual adjustments or a programmable system with a touchscreen interface, these features allow you to control your temperature and time. You can also access these systems via the internet to monitor your energy consumption and learn your habits over time for automated adjustments.

The control system in the heating, ventilating and air conditioning (HVAC) system has a major impact on the building’s comfort and energy use. In addition to controlling equipment, these systems can control lighting, fire alarms and access/security systems. A building-wide automation system or BAS is typically used to control these different mechanical systems in order to maximize energy efficiency, reduce costs and provide greater convenience for the occupants.

In modern control systems, HVAC system programming is increasingly driven by predictive algorithms that optimize resource usage based on past data. This new level of intelligence helps to increase sustainability, extend the lifespan of HVAC components and reduce the carbon footprint of buildings.

A key factor in achieving this level of performance is the ability to adjust airflow. Most HVAC equipment is designed to operate at peak conditions but this is only available for a small percentage of the year. During the rest of the time, equipment must operate at lean capacity to minimize energy consumption.

A zoning system breaks the home into two or more zones for more precise control of indoor climates. A central control panel is linked to programmable thermostats and motorized dampers in the ductwork that define each zone. The system can then be programmed to maintain a specific temperature and schedule, as well as calculate the electrical load of each space. This includes heat from people and their clothes, appliances and plug loads, as well as the solar load on the structure.

post

Ceiling Repairs You Shouldn’t Do Yourself

Ceiling Repairs Perth are essential to keep your property at its best. Whether it is patching, painting, popcorn ceiling removal or tile replacement, all contribute to a refreshed, captivating interior.

Ceiling Repairs

For small holes or cracks, repairing them with setting-type joint compound is a simple and cost-effective solution. For more significant damage, a new piece of drywall may be required.

Ceiling cracks are a common sign that it’s time to perform some repairs. The shape and size of the crack can provide clues to its cause. While one or two spiderweb-like cracks may be harmless and can sometimes be corrected with drywall repair techniques, any structural damage is serious and should be dealt with by professionals.

If the crack is accompanied by water stains, it could be due to a leaky roof, a burst pipe or other water-related issues. These issues must be addressed immediately to avoid further damage and potential mold growth, which also requires professional attention.

The crack may be the result of settling, which can cause the house to shift unevenly and lead to sagging and cracking. It’s possible to correct this issue by installing piers under the house, which can help shift the weight of the home and prevent future settling.

Another common cause of ceiling cracks is improper taping of drywall joints. This can cause the tape to loosen over time, leading to a straight crack. If the crack goes through a light fixture or vent, it will be more difficult to hide.

If you’re considering repairing a crack on your own, it’s best to get a few tools and a ladder from a local hardware store before starting. You’ll need to place a plastic sheet on the floor beneath the cracked area, as you’ll be loosening debris, applying mud and generally making a mess. It’s also a good idea to remove any furniture that’s in the way, as you’ll need plenty of room to maneuver and reach the ceiling.

After the crack is patched and sanded, you’ll need to paint it so that it matches the rest of your ceiling. Choosing a water-based primer that’s compatible with your ceiling paint will allow the new coat to adhere and blend seamlessly with the surrounding surface. Use a brush or roller to apply the paint, taking care to ensure even coverage. Be sure to choose a color that closely matches the rest of your ceiling for a professional-looking finish.

Water Stains

Water stains can leave behind unsightly brown spots that affect the overall appearance of your ceiling. They can also be a sign of an underlying issue that needs to be addressed, such as a leaky roof or plumbing problem. When the source of the stain is identified and fixed, it can prevent further damage and recurrence of the stain.

To clean a water stain on your ceiling, begin by protecting nearby surfaces with drop cloths. Then, using a sponge or cloth dampened with clean water, gently scrub the stain to remove it without damaging the surface. Rinse the area with clean water and allow it to dry completely before painting. Choose a paint that is designed to be used with water stains, such as a stain-blocking primer. Apply multiple coats as needed to achieve an even coverage, and let the paint dry between each coat.

Inspect the affected area of your ceiling visually to determine the extent of the damage. Look for areas with discolored or peeling paint and check to see if there is a soft, spongy texture. Water damage that is allowed to go unchecked can result in mold growth and structural issues, which are more serious and costly to repair.

If you find any signs of water damage to your ceiling, such as a hole or crack, patch it with a spackle or drywall compound. Once the affected area is dry, apply a stain-blocking primer and then ceiling paint to restore its appearance. Be sure to choose a paint that matches the existing color of the ceiling. Regularly inspect your ceilings and any other affected areas of your home to prevent water stains and ensure proper repairs. Contact a professional for more extensive problems such as a faulty roof or a major plumbing overhaul. A licensed plumber, contractor or mold remediation specialist can provide expert assessment and repairs to help prevent water stains in your home. They can also provide tips on how to avoid them in the future, such as regularly cleaning gutters and ensuring proper ventilation. By taking these steps, you can keep your home safe and beautiful for years to come.

Drywall Repair

Drywall repair in ceilings can be challenging for homeowners without the proper skills and tools. While DIY drywall projects can seem cost-efficient, improper repairs can lead to more damage or costly replacements down the road. A professional drywall contractor can save you time and money by doing the job right the first time.

If your drywall has visible cracks, water stains, or a sagging ceiling you will need a professional drywall repair company to fix the problem. A professional repair will not only restore the appearance of the ceiling but also protect it from further damage. Whether your drywall is damaged from a flood, water leak, or just due to age, a professional can repair the problems.

Small holes in drywall are often patched with a technique called “wall spackling.” A basic tool like a putty knife and joint compound can be used to apply a spackled coating. This technique is best for surface dings and small nicks, especially on the edges of rooms where wall-to-wall transitions occur. Larger nicks require more advanced techniques, such as mudding and taping to prevent future cracking. These larger holes are also called “tape patches” and require more finesse when applying the joint compound and sanding.

Large drywall cracks in ceilings are most commonly caused by thermal expansion and contraction of the structural framing and joists. Cracks may appear as a small hole or a sag in the ceiling. If left unchecked, cracks can cause serious problems such as rot and mold.

In some cases, a crack can be repaired by skim-coating the affected area. Painting contractor Noah Kanter describes the process:

The drywall must be sanded and reprimed before it can receive a skim coat. This process covers the blemishes, renews old drywall and plaster, and prepares it for paint. The result is a smooth surface that will not only look better but also reduce the cost of a full ceiling replacement.

Plaster Repair

It’s important to address water damage to ceiling plaster as soon as possible. To help prevent further damage to your home, turn off the water supply to the affected area, remove any excess moisture with a wet-dry vacuum or a towel, and open windows and set up fans to speed up the drying process. Once the area is dry, you can begin repairs.

When repairing plaster in a ceiling, it’s important to prepare the surface and apply a finish coat that will blend the repaired area with the existing ceiling. Start by removing any loose or crumbling plaster and filling in any cracks or holes. Next, apply a plaster compound using a putty knife. Aim for a smooth surface and apply additional layers of the compound as needed. After the surface is smooth, let it dry thoroughly according to product instructions.

Once the plaster is dried, it’s important to sand down the repair areas. This step is not only essential for a visually appealing restoration, but it’s also vital to ensure that the restoration can withstand future wear and tear. Silva recommends using a kitchen sponge to sand the compound, as it will reduce dust and mess compared to traditional sandpaper.

Depending on the extent of your damage, you may need to reattach loose plaster or replace damaged sections with drywall. For areas where the plaster is simply missing from the lath, reattachment is usually preferred. This approach will allow you to save a portion of your historic ceiling, and will be less expensive than replacing the entire area with drywall.

When reattaching loose plaster, make sure to protect the floors and furniture in your work area with drop cloths, and use a ladder or rolling scaffolding platform to safely access the ceiling. Be sure to wear a dust mask and safety goggles for protection. Once the area is clear of any debris, apply fiberglass mesh tape to the damaged section of the ceiling. Cover with a thin layer of setting-type joint compound, using the tape to avoid cracking and splitting. Smooth the compound and feather the edges to create a seamless surface.