Plumbers Topeka KS install, repair and maintain pipes that carry water, sewage, and gas to and from homes and businesses. They also inspect and test systems for safety. They often work on construction sites and collaborate with other professionals to ensure plumbing meets building codes and regulations.
They may also perform plumbing work on an emergency basis. These jobs can be dangerous because they involve working with hazardous materials, sewage, and high-pressure equipment.
A sump pump float switch is an electromechanical switch that turns a sewage pump on and off based on the liquid level of the sewage basin. These switches can fail due to multiple reasons, causing the pump to run continuously or heat up. It is important for plumbers to understand how these switches work and how to troubleshoot them when they malfunction.
Plumbers typically use specialized tools and techniques to install, repair, or replace plumbing systems in commercial and residential buildings. They also interpret blueprints and building codes to ensure that plumbing installations comply with all applicable regulations. They may need to collaborate with other professionals, including architects and construction teams, to ensure that plumbing is seamlessly integrated into the overall building design.
In addition to their technical knowledge of pipes and plumbing systems, plumbers must have strong interpersonal skills to effectively interact with customers. This includes listening attentively to customer complaints, providing accurate estimates for work, and answering questions about plumbing products and services. Plumbers also need to be physically able to perform labor-intensive tasks, such as lifting heavy equipment and tools.
A quality plumber can identify and resolve a variety of issues, from minor leaks to complex system malfunctions. They have the training and experience to provide efficient and effective solutions, as well as the stamina to perform difficult physical labor for extended periods of time.
Whether working on an indoor or outdoor plumbing system, plumbers must be able to cope with a range of environmental conditions. They often work in damp or humid conditions, and they can be exposed to bacteria and viruses that are excreted in human waste, such as cholera, typhoid, and hepatitis. Additionally, plumbing technicians can be at risk for infections from untreated cuts and scrapes.
In order to avoid infection, plumbers should always wear protective gloves and eyewear when handling sewage waste. They should also regularly clean their work area to remove any debris that could contaminate the water or cause injury. In addition, if they are using a tethered float switch, it is important that they make sure the tether does not entangle with the side of the sewage basin or any other cords. It is also advisable that they test the float switch on a regular basis, removing the cover and disconnecting the electrical wiring to do so.
Check the Pump Bearings
Plumbers are responsible for the installation, maintenance and repair of a wide range of plumbing systems in residential, commercial, and industrial settings. They must be skilled at using a variety of tools and equipment to identify and fix problems, including video cameras to inspect pipes, pressure gauges to test for leaks, and more. They also need to understand building codes and regulations, as well as how to read blueprints. Because they frequently interact with clients, plumbers need excellent customer service skills and must be able to clearly explain complex issues in easy-to-understand terms.
Bearings in centrifugal pumps are designed to reduce friction between rotating parts on the rotor, handle axial and radial loads, and maintain shaft position in the casing. However, they are subject to high operating temperatures and marginal lubrication, making them susceptible to failure. Bearing failure is most often due to static overload, wear, corrosion, lubricant failure, contamination, or overheating.
The first step in preventing pump bearing failure is to ensure that the bearings are correctly set. Bearings that are too tight can cause metal to metal contact and create excess friction, while bearings that are too loose will not absorb axial load or keep internal components cool. The type of bearing and the lubrication used will also play a role in the overall performance of the pump.
Various types of bearings are available for centrifugal pumps, each with its own advantages and disadvantages. For example, fluid-film bearings create a thin film of lubricant between the shaft and bearing surface, which separates them to prevent direct contact and reduce wear. This type of bearing is ideal for high-speed applications. On the other hand, sleeve bearings use cylindrical-shaped rollers to support the movement of moving parts and are suitable for low speeds. In addition, babbitt bearings are coated in a hard alloy material to improve their durability and are suitable for radial load only.
Another important factor in a pump’s performance is the type of seal it uses. In addition to preventing contaminants from entering the bearing, the seal must be capable of withstanding high operating temperatures and vibrations. To ensure the seal is the right fit for your pump, a professional should measure and inspect the pump for the correct dimensions.
Check the Sump Basin
The sump pump is an essential part of a home’s plumbing system. It is designed to collect and remove water that could damage the property if it floods or seeps into the basement or crawl space.
A plumber can inspect the sump pump for signs of a problem and recommend any repairs or maintenance that might be necessary. Keeping up with the regular maintenance and cleaning of a sump pump can extend its lifespan and help prevent any costly repairs in the future.
The pump’s mechanical parts become clogged and dirty over time, especially in the dirt-filled sump basin where silt often accumulates. The float switch, which turns the pump on when the water level rises, can also get tangled in the debris or jammed if it shifts within the sump pit. Fortunately, there are several add-ons that can help prevent this from happening.
One of the most important things you can do to extend the life and efficiency of your sump pump is to install a check valve. This device creates a one-way street for the water so it can only flow out of the pump and not back in. Without this device, the incoming water would cause water hammer, which can damage your home’s walls and floors.
Another way to extend the lifespan of your sump pump is to make sure it is not overtaxed. You can do this by removing any items stored around the pump, and ensuring that there is nothing blocking or tripping over the discharge line. You should also regularly clean the discharge hose, and make sure it is free of debris and obstructions.
A sump pump is an effective and affordable way to protect your home or business from water damage, mold, wood rot, and pests. It can even lower your home’s value if it does not have one, which is why it is so important to keep up with its regular maintenance and cleaning. Our plumbers are certified to inspect and repair your sump pumps, as well as backflow devices. Contact us to learn more about our services or schedule an appointment today!
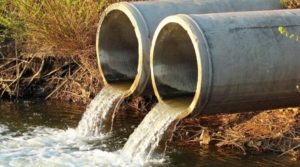
Check the Discharge Line
Whether it’s a small leak or a major system malfunction, plumbers must be able to troubleshoot the problem and find an effective solution. This requires a strong knowledge of science and water flow, the ability to work with different materials, and a thorough understanding of building codes and regulations. Plumbers also need good physical stamina, as they often spend long periods of time on their feet and working in tight spaces.
Plumbers install and repair pipes, fixtures, and appliances in residential, commercial, and industrial settings. They often work from blueprints and plans to create plumbing infrastructure for new construction projects. They may also be responsible for maintaining existing systems by inspecting, testing, and repairing equipment. Plumbers are also expected to be familiar with a wide range of tools and building supplies.
A successful plumber must have excellent communication skills to listen to customer concerns and explain complex technical topics in a way that is easy for laypeople to understand. In addition, they must be able to make precise measurements and follow detailed instructions when installing plumbing components. Plumbers also need to be able to work well under pressure and on tight deadlines.
In some cases, plumbers may be required to work with hazardous materials or in confined spaces. This can pose a health and safety risk for the plumber, so they must follow all appropriate precautions when handling these substances. In addition, plumbers may be required to work evenings and weekends to respond to emergency calls.
The most common job site for a plumber is a residential home. However, they can also be found in office buildings, hospitals, factories, and other large industrial facilities. In these settings, plumbers may need to collaborate with other professionals such as architects and construction teams to ensure that plumbing systems are seamlessly integrated into the overall building design. They also need to be able to work on large-scale plumbing equipment and systems that are designed for high-occupancy areas.